
Harris, Reed & Seiferth
|
 Riding a personal watercraft (PWC) can be absolutely exhilarating. Jetting across a body of water with mist and wind in your face can almost make you feel like an action movie hero! However, even though PWCs can be fun, they can also be dangerous. It's very important to implement safety practices for you and anyone else while on the water. Whether you're jet skiing for the first time or a veteran, brush up on these safety tips so you're prepared during your next adventure.
Wear a life jacket. This is first on our list for a reason. Even if you are a strong swimmer, your body can be overcome by water. Life jackets will prevent you from sinking and help you conserve energy while you wait for help to arrive. Use your safety lanyard. Some PWCs come equipped with safety lanyards that attach to your wrist or life jacket. If you fall off your vessel, the safety lanyard will detach. This will automatically disable the engine, allowing to you safely reboard. Wear a whistle around your neck. Depending on the situation, it can take a while for someone to realize you need help, especially if you're far into the water. Wearing a whistle around your neck will allow you to call for help and be heard at least a half mile away. Utilize your emergency compartment. Many personal watercrafts have waterproof compartments that allow you to safely store emergency items such as cell phones, first aid kits, fire extinguishers and even blowhorns. If this type of storage space is available to you, we recommended using it. Read the owner's manual. While this may not be the most fun activity, it is important to understand your PWC and how it operates. This can help lessen your chances of making a mistake while operating the vehicle and teach you about several emergency functions you may not know you have. Avoid boarding while the engine is running. If you attempt to board a PWC while its engine is running, the thrust system can ingest loose items such as hair and clothing. This can cause serious injury and should be avoided at all costs. Other useful tips:
If you're looking for Personal Watercraft Insurance, you can get a quote online. Sources: https://www.foremost.com/learning-center/personal-watercraft-pirate-prepare-unexpected.asp https://www.discoverboating.com/resources/personal-watercraft-safety-and-you https://www.thecampfirecollective.com/blog/operating-a-personal-watercraft/#:~:text=Never%20attempt%20to%20re%2Dboard%20when%20the%20engine%20is%20running,they%20have%20safely%20re%2Dboarded
0 Comments
 The votes have been counted and the results are in! Harris, Reed & Seiferth Insurance Group is a 2023 Best of Florida® Regional winner in Guide to Florida’s annual readers’ poll. Guide to Florida readers and editors have weighed in on the best of everything in Florida, honoring thousands of businesses and organizations in more than 25 broad business and community sectors. The process starts with a nomination on the Guide to Florida website. Voting remains open throughout the year, with tens of thousands of votes ultimately received. The process culminates with the publishing of the Best of Florida Keepsake Annual along with a statewide publicity campaign. 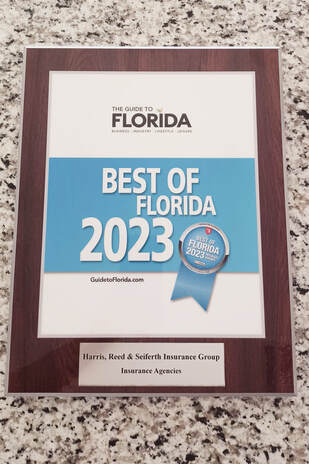 Best of Florida winners and nominees are chosen by a combination of readers’ votes and editors’ input, and are vetted through several ranking sites, Better Business Bureau complaint reports, and voting pattern analysis reports.
Winners are named in hundreds of individual categories, providing Guide to Florida readers with a go-to-guide for the best of everything in Florida. Guide to Florida recognizes three levels of winners: The Best of Florida, Best of Florida Regional Winners and Honorable Mentions. Within each category, there are multiple honorees named in each tier, depending on the size of the market sector. You can view the full list of Best of Florida winners at GUIDEtoFLORIDA.com/best-of/ 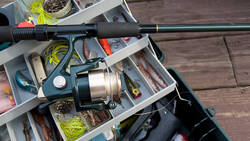 There are few better things to do in the summer than being on open water and fishing with friends. Before you head out to your favorite spot to reel 'em in this season, make sure you have a well-supplied tackle box. Here's our list of seven tackle box essentials.
These seven basics won't guarantee you fish for days, but they should help make your next fishing excursion less stressful! Source : https://www.foremost.com/learning-center/7-things-you-need-in-a-tackle-box.asp 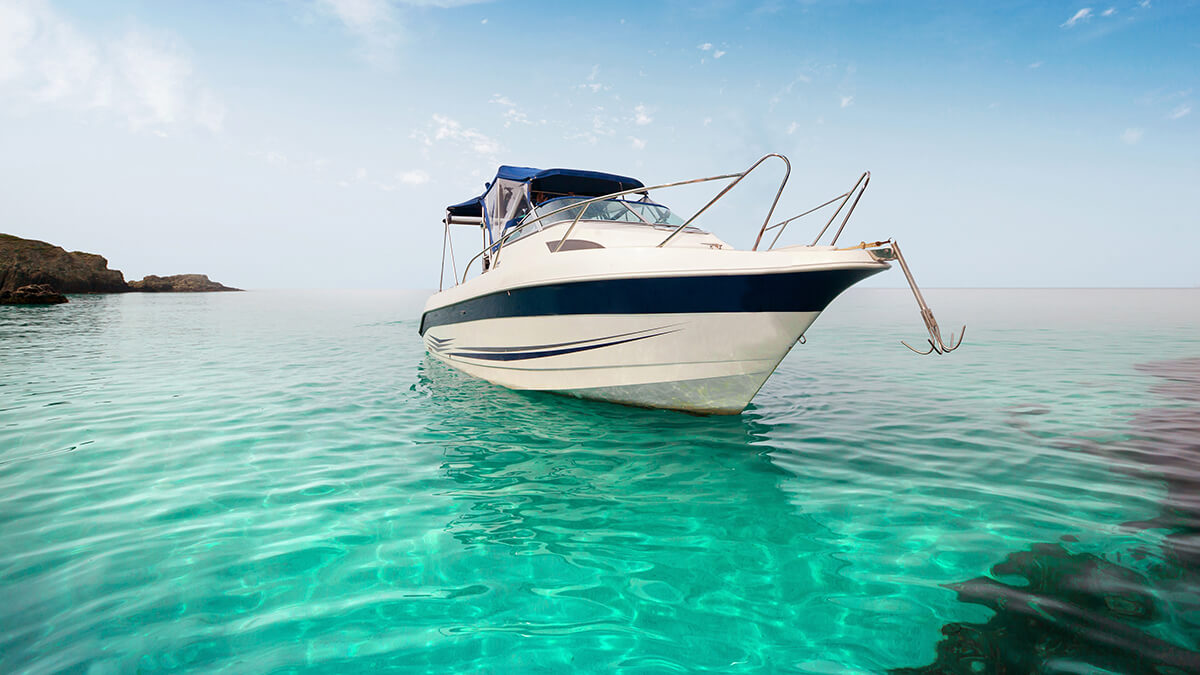 Do you own a boat and are you looking for insurance coverage but don't know where to start? If can seem overwhelming at first, and that's why it can be a good idea to seek advice from an insurance agent. We spoke with a marine product manager to gain some insight on boat insurance, and they recommend five important questions you may want to ask while shopping around.
1. Do I need insurance for my boat? "Some people may think that their boat is adequately covered through an endorsement on their homeowner's policy. Worse yet, they don't carry any coverage at all. Boat owners should look for a specialized insurance policy that offers the coverages that fit their boat and lifestyle. It's better to be prepared and have it insured for peace of mind while on the water." 2. Will my personal property be covered? "Buying life vests, water skis and fishing gear can really add up. A good policy will not only provide coverage for all of this equipment, but also for other personal property on board." 3. What discounts are available? "There's a variety of discounts a customer could qualify for, like a multi-policy discount if they insure more than just a boat with the same company, or a multi-unit discount if they insure more than one boat. Discounts will help a customer save money on the policy's premium." 4. Is towing and roadside assistance available? "A day of fun in the sun could easily be ruined if the boat breaks down while on the water. This is a great coverage to add to a policy and covers either the cost of certain emergency fixes at the point where the boat broke down, or the cost of towing the boat to nearest repair shop. Towing and assistance should also apply to the trailer if it breaks down while towing the boat." 5. Is the type of boat I have eligible for insurance coverage? "There are many different kinds of boats — pontoons, open bow, fishing boats, cabin cruisers—and even more things to consider like speed, length, value and use of the vessels. That's why it's important to make sure your agent knows all these things up front, even how you will use your boat. Your agent can help you get the insurance coverages that are just the right fit." Looking for boat insurance? Get a quote today by clicking here. Source: https://www.foremost.com/learning-center/five-questions-to-ask-about-boat-insurance.asp
Out of sight, out of mind! It's a saying that's too often true about making repairs around the base of your home. Problems with manufactured home skirting are common, but thankfully, replacing your mobile home's skirting is easier than you might think.
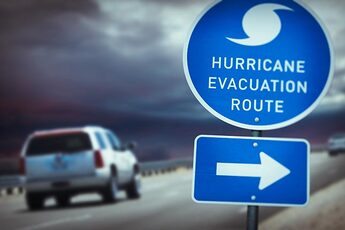 If it becomes necessary to evacuate, plan for it ahead of time. Talk it over and make decisions so everyone is on the same page. Preparation can save lives and reduce the amount of time it takes to get your family to safety and eventually back home.
Evacuation plan
 Hurricanes. Just the thought of them can make a person tremble in fear. Whether you've experienced a hurricane yourself or you've just heard about their destructive patterns, these bad boys know how to make their name heard. The technical definition of a hurricane is a tropical cyclone with maximum sustained winds of at least74 mph. A major hurricane is a tropical cyclone with maximum sustained winds of at least 111 mph. To put that into perspective, imagine sticking your head out the window of a car as you travel down the highway - that's the speed of wind you would be up against during a low-scale hurricane. Sound scary? It is. By knowing your vulnerability and what actions to take, you may be able to reduce the effects of a hurricane disaster.
Hurricane season runs June 1 through November 30. Foremost wants to share some tips to ready your home and family prior to a severe storm, may it hit. It's never too early to:
Stay safe through these storm seasons! Your safety is number one to us. Source: https://www.foremost.com/learning-center/more-storms-to-come-during-hurricane-season.asp 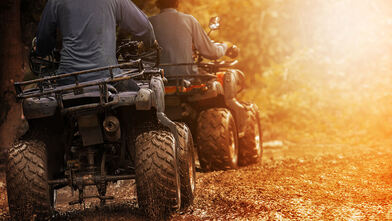 There have been times in my life when I've felt severely unprepared. I remember starting drivers training and getting behind the wheel for the first time with my instructor, nervously thinking to myself, We've only talked about driving in the classroom—I don't think I'm ready to be on the roads! And during my time as a college student, I've known the horror of being caught off guard by spontaneous pop quizzes. I've even found myself at the starting line of a 25K road running race, regretfully wishing that I had spent more than just two weeks training for the event.
Recalling these experiences makes me glad I was not negligent my first time riding an ATV. This time, I felt prepared. I had carefully learned the rules of riding safely, I was wearing the proper gear, and I was on trails designated for off-road vehicles with other experienced and responsible riders. This preparation gave me confidence and allowed me to relax and enjoy the ride. It was an absolute blast! Riding an ATV can be thrilling, but also dangerous, so it's important to brush up on how to ride safely before you hit the trails. Whether you are a new rider learning for the first time or an ATV veteran in need of a quick refresher, here are ten tips for being prepared and staying safe on your off-road adventures:
Source: https://www.foremost.com/learning-center/off-road-adventures-staying-safe-on-your-atv.asp  What do outdoor adventures look like for you? Whether it's an ATV, UTV, dirt bike, dune buggy, golf cart or other off-road vehicle (ORV), you'll want to make sure you have the right type of insurance coverage to protect your toys. It's important to ask your independent insurance agent the right questions about what type of coverage you're seeking and customize it to fit your lifestyle. To help you get started, we put together the following list of questions after speaking with Kevin Henry, the Director of Product Management at Foremost® Insurance.
1. What typical coverages are available for ATV/UTVs? "Ask your agent or broker about standard coverages that are available, as well as optional ones you might consider," says Henry. "Standard coverages include Collision, Other Than Collision, Liability and Medical Payments. They help provide coverage for damage to your ATV itself or damage or injury that you may cause while riding your ATV." 2. Is my safety apparel covered? "Whether it's helmets, goggles or other clothing that helps minimize injuries from an accident, most companies will offer safety apparel coverage for when these things get damaged," says Henry. "We want riders to be as safe as possible while enjoying the outdoors, so we encourage wearing safety gear." 3. Is there optional equipment coverage available? "Most people have customized or added options to their ATVs," Henry explains. "Optional Equipment coverage helps cover things like towable trailers, racks and winch kits for your ATV." 4. Am I able to insure my ATV/UTV year-round? "Year-round coverage is definitely something you may want to consider," answers Henry. "Some policies have a lay-up period for colder weather when you may not be able to ride. But when an unusually warm day comes around and you want to take your ATV out, you might be stuck without coverage. A year-round policy lets you take it out whenever Mother Nature's providing good weather and, with some companies, you can do this for the same price as seasonal coverage." 5. What kinds of discounts are available? "Everybody wants to save money," Henry shares. "Ask what's available for you. Some companies, like Foremost, offer discounts for things like multi-units, multi-policies, maintaining continuous coverage when you renew and for having prior off-road vehicle insurance." Your safety is number one to us. Stay safe wherever you choose to go on your off-road vehicle. Looking for ATV insurance? Get a quote today by calling 561-768-8176 to speak with a licensed agent. Source: https://www.foremost.com/learning-center/top-questions-to-ask-about-off-road-vehicle-insurance.asp  Golf Carts look quite easy to drive, but they sure handle differently than other vehicles. When I was 14, I thought I could just hop on one and drive it like a pro. Well I drove it … right into a tree. I learned the hard way that I should’ve taken things slow and let someone else teach me how to drive it. Now I know how to drive one – without crashing – and so can you! Here are some Golf Cart safety tips to read up on before you hit the gas and make the same mistake I did.
Review your manufacturer's guide for other warnings and safety guidelines! To protect your Golf Cart, insure it with Foremost®! Don't let your fun get cut short because you didn't get the right coverage for your ride. Luckily, an agent can help you choose the right policy for your Golf Cart. Source: https://www.foremost.com/learning-center/golf-cart-safety-15-tips-to-avoid-injury.asp |
Categories
All
Archives
May 2024
|

 RSS Feed